20 minute workout at home for beginners works best when it starts slow, stays controlled, and uses moves a first timer can actually repeat with good form. No gym, no equipment, and no jumping are needed for the core session below.
Stop at once if you feel sharp pain, chest pain, dizziness, or unusual shortness of breath, and seek care promptly. Muscle tiredness is normal, while sharp joint pain is a clear stop signal.
The 20 Minute Routine, With a Timer
Four minutes warm up, thirteen minutes main circuit, and three minutes cool down make the full twenty minutes, with no hidden extra time. Set a phone timer, keep water nearby, and clear a space about two metres by two metres.
Two rounds suit week one, while three rounds suit later weeks, when form stays clean and recovery feels easy. Rest longer than the clock suggests whenever breathing or form breaks down, since extra rest beats sloppy reps.
One to two good reps left at the end of each set is the right effort for beginners, in the reps in reserve method used by trainers. Going to total failure on day one creates soreness that kills week two, while easy, controlled reps build a habit.
| Block | Time | What to do |
| Warm up | 0:00 to 4:00 | March in place, arm circles, gentle squats, side steps, torso twists, 30 seconds each, twice through |
| Main circuit, round 1 | 4:00 to 10:30 | Six moves, 30 seconds work, 20 seconds rest, plus 30 seconds extra rest after the round |
| Main circuit, round 2 | 10:30 to 17:00 | Same six moves, same work and rest, with easier versions whenever form slips |
| Cool down | 17:00 to 20:00 | Slow walking, deep breathing, quad stretch, chest stretch, hamstring stretch, child pose |
Quick answer: what a good beginner session contains
- Warm up first, with gentle marching and arm movement, so joints, muscles, and breathing rise gradually, not suddenly.
- Six basic moves, covering legs, push, hinge, single leg balance, core brace, and gentle cardio, for full body balance.
- Easier version for every move, so no single move forces a beginner to stop the whole session.
- Cool down last, with slow walking and gentle stretching, so heart rate and breathing return to normal calmly.
Who This Routine Suits, and Who Should Check First
First timers suit this routine, since every move uses body weight only, with a chair or wall available for support. No prior gym experience, no dance skill, and no flexibility test are needed to start safely.
Returners after a long break suit this routine, provided they start at week one, not at their old level. Strength and stamina fade during a break, and a gentle restart protects joints, tendons, and confidence.
Small space readers suit this routine, since all moves stay in one spot, with no travel across a room, no jumping, and no equipment drop. A living room corner, bedroom, or hotel room works, with a mat for comfort.
Older adults can use this routine with chair support, shorter holds, and balance help, provided a clinician has cleared them for exercise. Balance work matters more with age, and a sturdy chair nearby turns a balance risk into a safe practice.
Check first if any of these apply
- Heart disease, high blood pressure, diabetes, or a history of chest pain during activity, since a clinician should clear intensity and any limits first.
- Knee, hip, back, shoulder, or wrist pain that is sharp, swelling, or getting worse, since a physical therapist can suggest safer versions.
- Pregnancy, recent surgery, recent injury, or a new medical diagnosis, since generic routines cannot replace personal clearance.
- Dizziness, fainting, or breathlessness at rest, since those symptoms need medical review before any new exercise program.
Warm Up: 4 Minutes, Gentle and Dynamic
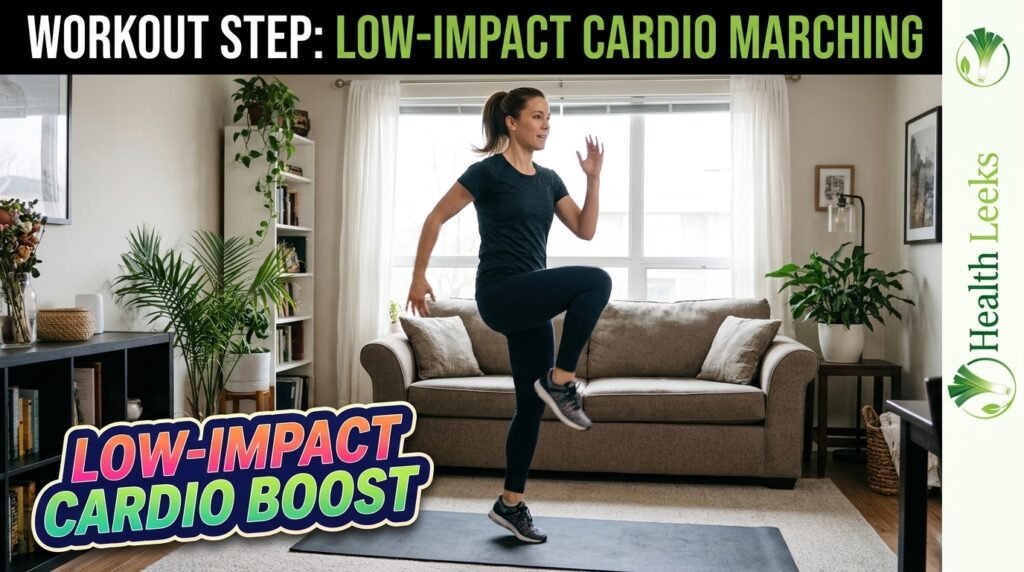
March in place for 30 seconds, with arms swinging naturally, knees lifting only as high as feels comfortable. Keep steps light, land softly, and breathe normally, without holding your breath.
Arm circles for 30 seconds, small at first, then slightly larger, forward for 15 seconds, then backward for 15 seconds. Keep shoulders relaxed and down, away from the ears, with a tall chest and soft knees.
Gentle squats for 30 seconds, using a chair for support if needed, with a shallow range that feels easy. Sit back as if toward a chair, keep heels down, and stand tall, without forcing depth.
Side steps for 30 seconds, stepping left and right with a slight knee bend, arms swinging gently. Keep steps small in a small space, with feet staying under control, not sliding or crossing awkwardly.
Torso twists for 30 seconds, standing tall, turning gently left and right, with arms relaxed at chest height. Keep hips mostly still, move from the waist, and stop well before any back pinch or pain.
Repeat the full warm up once, for a second 2 minutes, with slightly larger arm circles and slightly deeper squats if they feel easy. Warm muscles move better, balance improves, and the main circuit feels less like a shock.
Main Circuit: Six Moves, Full Body, No Equipment
Work 30 seconds, rest 20 seconds, moving to the next move in order, with 30 seconds extra rest after each full round. Quality beats speed, so slow, controlled reps beat fast, sloppy reps every time.
Move 1: Bodyweight squat, or chair squat
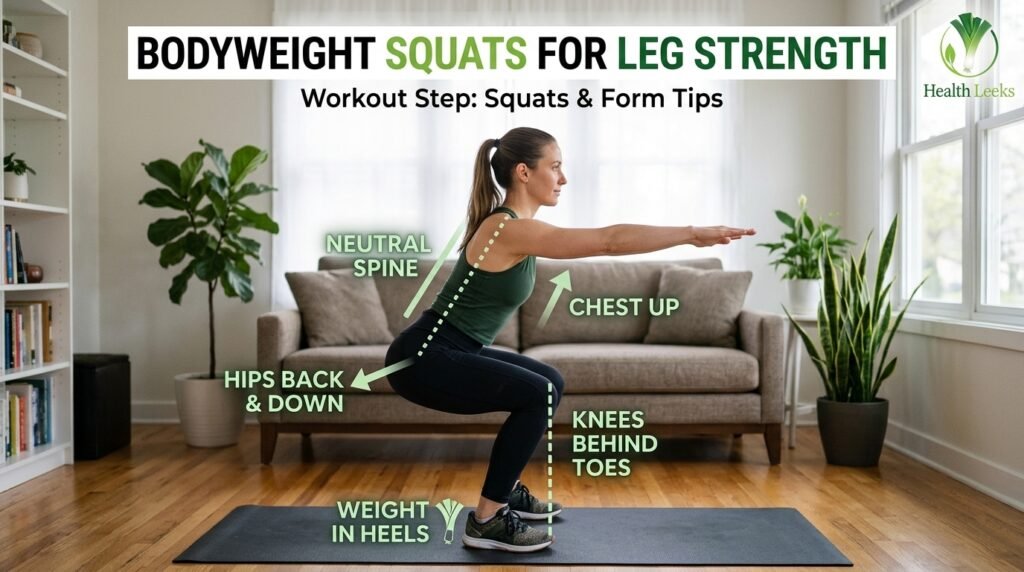
Stand with feet shoulder width apart, toes pointing slightly out, chest tall, and arms forward or crossed at chest height. Sit hips back and down, as if toward a chair, keeping heels on the floor and knees tracking over toes.
Depth should feel controlled, with thighs roughly parallel to the floor only if that depth stays pain free and balanced. Shallow squats count fully for beginners, and depth can increase over weeks as strength and mobility improve.
Chair squat is the easier version, sitting back until hips touch the chair, then standing tall through the heels. Use a sturdy chair against a wall, keep the chair still, and press through the whole foot, not just the toes.
Move 2: Wall push up, or knee push up
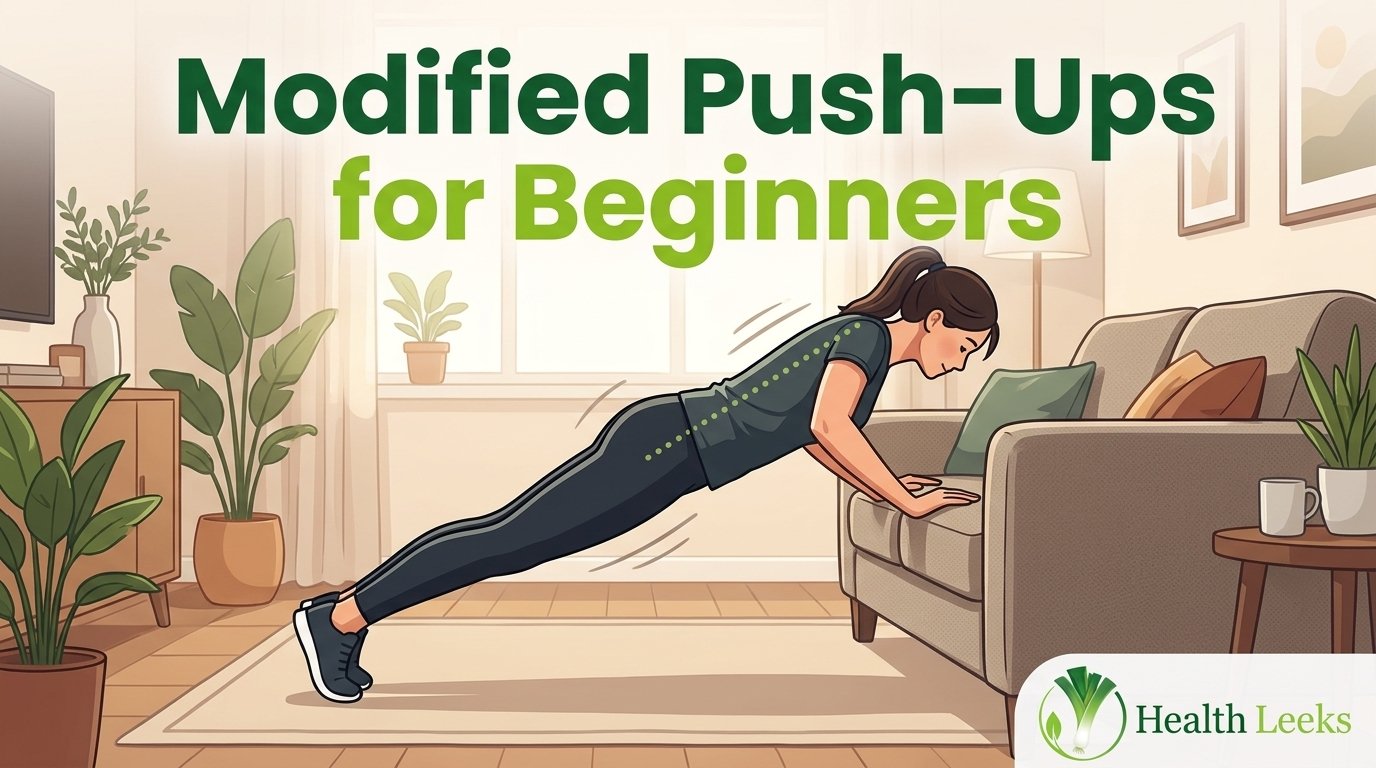
Stand facing a wall, hands at shoulder height, slightly wider than shoulders, feet back far enough to feel chest and arm work. Bend elbows slowly, bring chest toward the wall, then press back, keeping a straight line from head to heels.
Wall angle controls difficulty, since a steeper wall angle, closer to the wall, feels easier, while a flatter angle, further from the wall, feels harder. Move feet closer whenever the last reps lose form, since a good wall push up beats a sloppy floor push up.
Knee push up is the next step, on a mat, hands under shoulders, knees on the floor, body straight from head to knees. Lower chest toward the floor slowly, keep elbows at about 45 degrees, and press back without letting hips sag or pike.
Move 3: Glute bridge, hip hinge without load
Lie on your back, knees bent, feet flat, hip width apart, arms relaxed at your sides, palms down. Press through heels, lift hips until shoulders, hips, and knees form a straight line, squeeze glutes at the top, then lower slowly.
Glutes should do the work, not the lower back, so keep ribs down and avoid arching the back at the top. A short pause at the top, one to two seconds, teaches control better than fast, bouncy reps.
Shorter range is the easier version, lifting hips only halfway, with a smaller squeeze, until strength improves. Single leg glute bridges come later, only after two leg bridges feel easy for full rounds.
Move 4: Reverse lunge, or step back
Stand tall, hands on hips or at chest height, then step one foot back, lowering until both knees bend comfortably. Front knee should track over the front foot, back heel lifts, and torso stays tall, without leaning far forward.
Step back lunges suit beginners better than forward lunges, since balance feels steadier and the front leg controls the landing. Use a chair or wall for light fingertip support whenever balance wobbles, since support builds confidence safely.
Step back without a lunge is the easier version, stepping one foot back and returning, with no deep knee bend, just a gentle weight shift. Add depth only when balance, knee comfort, and control stay steady for a full round.
Move 5: Bird dog, or dead bug
Bird dog starts on hands and knees, wrists under shoulders, knees under hips, back flat, core braced gently. Reach one arm forward and the opposite leg back, hold one to two seconds, return slowly, then switch sides.
Hips should stay level, without rocking side to side, since level hips show core control better than long reaches. Shorter reaches count fully, and a wall or chair version works for readers who dislike floor work.
Dead bug is the floor alternative, lying on your back, arms up, knees bent at 90 degrees, lower back pressed gently into the floor. Lower one arm and the opposite leg slowly, return, then switch, keeping the lower back still throughout.
Move 6: Knee plank, or forearm plank
Knee plank starts on forearms and knees, elbows under shoulders, body straight from head to knees, core braced, glutes gently engaged. Breathe normally, keep neck neutral, and look at the floor between the hands, not forward.
Fifteen to thirty seconds is a good beginner plank, with form stopping the set, not the clock, whenever hips sag or pike. Short, clean planks build core stability better than long, sagging planks that strain the lower back.
Wall plank is the easiest version, leaning against a wall, forearms on the wall, body straight, core braced. Move feet further back for more challenge, closer for less, with the same straight line and breathing rules.
Easier Version for Every Move
Every move below has a standard version, an easier version, and a form cue, so no move forces a stop. Use the easier version for the whole round, not just for one rep, until the standard version feels controlled.
| Move | Standard version | Easier version | Form cue |
| Squat | Bodyweight squat, 10 to 15 reps | Chair squat, touch and stand | Chest tall, heels down, knees over toes |
| Push up | Knee push up, 6 to 10 reps | Wall push up, steeper angle | Straight line, elbows about 45 degrees, slow lower |
| Glute bridge | Full bridge, 10 to 15 reps | Half bridge, shorter range | Squeeze glutes, ribs down, no back arch |
| Reverse lunge | Reverse lunge, 6 to 8 per side | Step back, no deep bend | Tall torso, front knee over foot, chair support if needed |
| Bird dog | Bird dog, 6 to 8 per side | Dead bug, or shorter reach | Level hips, slow return, breathe normally |
| Plank | Forearm plank, 15 to 30 seconds | Knee plank, or wall plank | Straight line, no sag, no pike, neck neutral |
| Gentle cardio | Marching, 30 seconds | Walking in place, slow | Light steps, soft landing, arms swing naturally |
Progression rule is simple, make a move harder only when the last reps feel easy with perfect form. Add reps first, then rounds, then a harder version, never all three in the same week.
Low Impact, No Jumping Version
Low impact means one foot stays on the floor, with no jumps, no hops, and no hard landings, which suits knees, joints, and apartment neighbours. Low impact does not mean low effort, since slow, controlled reps with good range still raise heart rate and build strength.
Step touch replaces jumping jacks, stepping side to side with arms opening gently, at a pace that keeps breathing steady but noticeable. Walking jacks, a slower version of jumping jacks with no jump, work well as a gentle cardio move between strength moves.
Marching replaces high knees, lifting knees only as high as feels comfortable, with a brisk but controlled pace. Standing mountain climbers, driving knees up one at a time while standing, replace floor mountain climbers for beginners.
Step back replaces burpees fully, since burpees combine a squat, plank, push up, and jump, which is far too much for day one. A step back, a squat, and a wall push up, done separately, give the same muscle groups without the jump or the floor drop.
Low impact swap table
| High impact move, avoid on day one | Low impact swap | Joint note | Noise note |
| Jumping jack | Step touch, or walking jack | No landing load on knees or ankles | Quiet, apartment friendly |
| Jump squat | Chair squat, slow | No landing load, depth controlled | Quiet, no floor thump |
| Burpee | Step back, squat, wall push up, separately | No floor drop, no jump, no wrist load from a fast plank | Quiet, no floor impact |
| Mountain climber, floor | Standing knee drive, slow | No wrist load, no fast hip flexion | Quiet, no floor movement |
| Skater jump | Side step with knee lift | No lateral landing, balance controlled | Quiet, small space |
| High knee run | Marching in place, brisk | No pounding, knee height controlled | Quiet, soft landing |
Knee Friendly Version
Knee friendly does not mean no leg work, since glutes, hamstrings, and hip strength actually support knees over time. It means avoiding deep squats, jumps, forward lunges with a long stride, and any move that causes sharp knee pain.
Chair squats lead the knee friendly leg section, with a shallow range, heels down, and a sturdy chair for support. Glute bridges follow, since they strengthen glutes and hamstrings with no knee bend under load.
Side lying leg lifts add hip strength, lying on one side, bottom arm under the head, top leg lifting slowly, with hips stacked. Clams, with knees bent and feet together, opening the top knee like a clam shell, add gentle hip work without knee load.
Step back lunges replace forward lunges, with a short step, a shallow bend, and chair support, stopping well before knee pain. Wall sits, with back against a wall and knees at a comfortable angle, work as a later option, only if knees stay pain free.
Knee friendly move list
- Chair squat, shallow range, sturdy chair, heels down, chest tall, stop before pain.
- Glute bridge, full or half range, squeeze glutes, ribs down, no back arch.
- Side lying leg lift, slow lift, hips stacked, no rolling back, switch sides.
- Clam, knees bent, feet together, open top knee slowly, keep pelvis still.
- Step back, short step, shallow bend, chair support, tall torso.
- Marching, brisk but controlled, knee height comfortable, soft landing.
Clinician referral matters for knee swelling, locking, giving way, or pain that lasts more than a few days after a session. A physical therapist can check squat depth, hip strength, and footwear, which generic routines cannot assess.
Small Space and Quiet Version
Two metres by two metres is enough, with a mat, a chair, and a wall, all within reach, and no travel across the room. All moves above fit that space, since squats, bridges, planks, and bird dogs stay in one spot.
Quiet moves protect neighbours, with soft landings, no jumps, no dropped weights, and no fast floor work. A thick mat helps with noise and knee comfort, especially on hard floors, while soft shoes or bare feet on a mat both work.
Travel moves to avoid in small spaces include walking lunges across a room, skater jumps, lateral jumps, and long step sequences. Replace them with reverse lunges in place, side steps in place, and marching in place, which give the same muscles without travel.
Morning and lunch break versions use the same routine, with a shorter warm up if time is tight, but never skip the warm up fully. A five minute version, with one round only, beats a skipped session, and it keeps the habit alive on busy days.
Walking Version: 20 Minutes, Low Impact
Walking at home suits readers who dislike floor work, with about 2,000 to 2,500 steps in 20 minutes in video summaries, at a gentle to brisk pace. Steps vary by pace, stride, and body size, so the range is an estimate from video summaries, not a guaranteed count.
Warm up with easy walking for 2 minutes, then side steps, heel backs, and reach up and down, each for 30 seconds, with arms swinging naturally. Keep steps light, posture tall, and breathing steady, with a pace that allows talking in short sentences.
Main walking block runs about 14 minutes, with double knee lifts, gentle kicks, mini squats, side walks with open arms, and arm swing walks, each for 30 to 60 seconds. Make moves bigger for more effort, smaller for less, with no jumping, no running, and no floor work.
Cool down with easy walking for 2 minutes, then sit back and reach, single arm reach, arm across chest, and slow breathing, each for 30 seconds. Walking alone does not cover muscle strengthening, so pair walking days with strength days for full weekly balance.
Walking versus strength, comparison
| Feature | Walking version | Strength circuit version |
| Main benefit | Aerobic fitness, steps, mood, gentle cardio | Muscle strength, balance, core stability, bone health context |
| Equipment | None, mat optional | None, chair and wall optional |
| Impact | Low impact, no jumping | Low impact, no jumping, with floor work |
| CDC contribution | Aerobic minutes | Muscle strengthening days, plus some aerobic minutes |
| Best for | First movement habit, gentle days, recovery days | Strength, posture, and full body balance |
| Limitation | No push, hinge, or core strength work | Needs floor space and mat comfort for some moves |
Cool Down: 3 Minutes, Breathing and Gentle Stretching
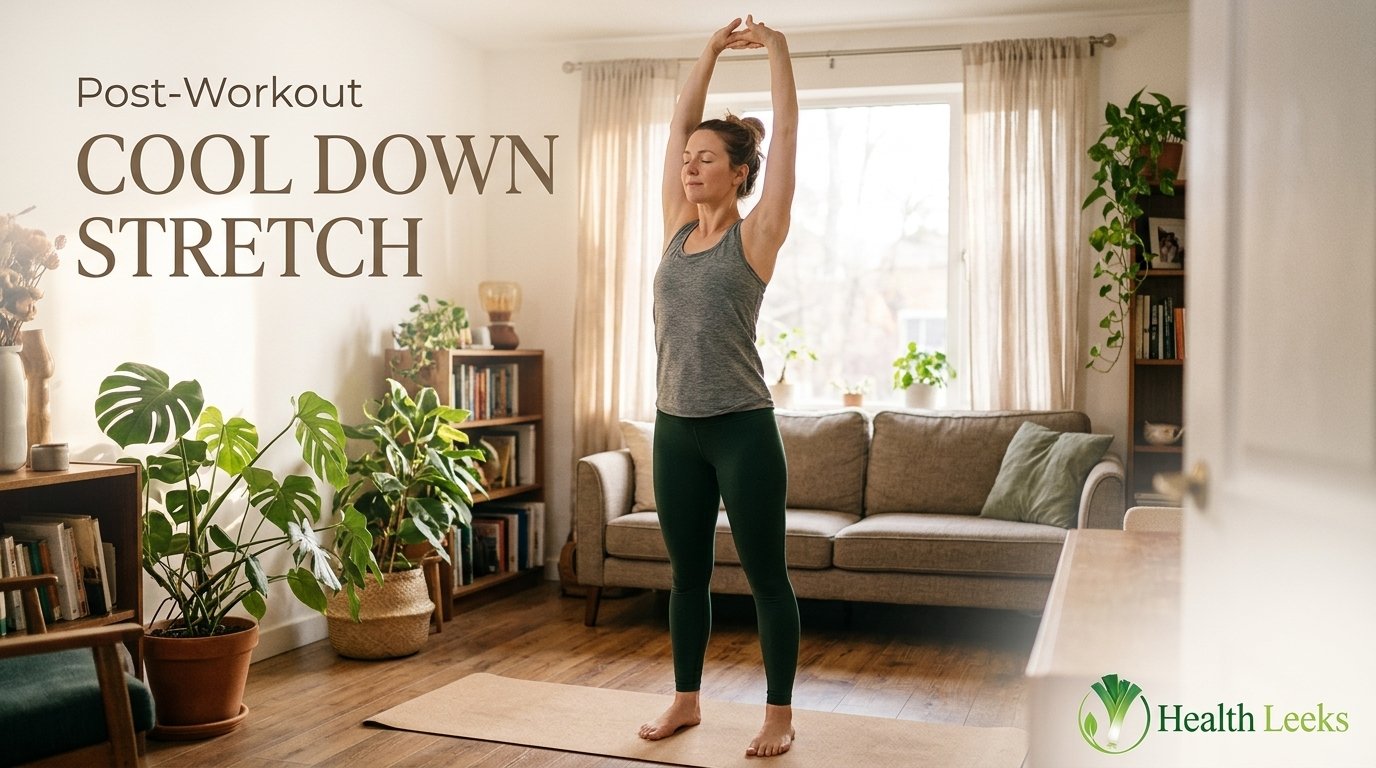
Slow walking for 30 seconds brings heart rate and breathing down gradually, with arms relaxed and steps easy. Deep breathing follows, inhaling through the nose, exhaling slowly through the mouth, for 30 seconds.
Quad stretch for 30 seconds per side, holding a chair or wall for balance, pulling one foot gently toward the glutes, with knees close together. Stop before any knee pinch, and use a standing calf stretch instead if the quad stretch feels uncomfortable.
Chest stretch for 30 seconds, hands clasped behind the back, or one arm across the chest, with shoulders down and chest open. Gentle hamstring stretching follows, with one foot forward, heel down, hips back slightly, and a tall back.
Child pose for 30 seconds finishes the session, knees wide or together, arms forward, forehead resting on the mat if comfortable. Breathe slowly, notice muscle warmth and tiredness, and note any sharp pain for review before the next session.
How Often, Weekly Schedule, and CDC Math
Two to three strength sessions per week, on non consecutive days, suit beginners, with at least one rest day between sessions for the same muscle groups. Rest days are when muscles recover and adapt, so daily strength sessions for the same muscles slow progress and raise soreness.
Walking or gentle movement on other days adds aerobic minutes, improves mood, and keeps the habit alive without overloading muscles. A walk, a gentle cycle, or a dance session all count as aerobic activity, provided intensity feels moderate, with breathing noticeably harder but talking still possible.
CDC recommendations for adults, from the Centers for Disease Control and Prevention, call for 150 minutes of moderate intensity aerobic activity per week, or 75 minutes of vigorous activity, or an equivalent mix, plus muscle strengthening on at least 2 days. Some activity is better than none, and benefits increase with more activity, according to CDC summaries.
Weekly math matters, since three sessions of 20 minutes equal 60 minutes, which is less than the 150 minute aerobic target. Add walking days, for example 30 minutes on three other days, to reach 150 minutes total, with two of the strength sessions counting toward the muscle strengthening target.
Weekly schedule example
| Day | Session | Minutes | Type |
| Monday | 20 minute strength circuit | 20 | Strength, plus some aerobic |
| Tuesday | Walking at home, gentle to brisk | 30 | Aerobic |
| Wednesday | Rest, or gentle stretching | 10 to 20 | Recovery |
| Thursday | 20 minute strength circuit | 20 | Strength, plus some aerobic |
| Friday | Walking at home, gentle to brisk | 30 | Aerobic |
| Saturday | 20 minute strength circuit, or walking | 20 to 30 | Strength or aerobic |
| Sunday | Rest, or gentle stretching | 10 to 20 | Recovery |
Older adults add balance work, according to CDC older adult recommendations, with balance activities each week, plus the same 150 minutes aerobic and 2 days muscle strengthening targets. Chair support, heel to toe walking, and single leg balance practice, with support nearby, suit older readers well.
4 Week Progression: Form First, Then Reps, Then Rounds
Week one sets the habit, with two rounds, easier versions, and a focus on form, breathing, and recovery. Soreness the next day is normal, while sharp pain is not, and extra rest beats pushing through pain.
Week two adds reps, with the same two rounds, but slightly more reps per move, or slightly longer holds, when the last reps feel easy. Keep rest the same, keep form clean, and keep one to two good reps in reserve.
Week three adds a third round, with the same reps, but a shorter rest between rounds if recovery feels easy. A third round adds about six to seven minutes, so total session time rises to about 26 minutes, which is fine, since the 20 minute label is a starting point, not a ceiling.
Week four adds a harder version, with knee push ups instead of wall push ups, full squats instead of chair squats, or forearm planks instead of knee planks, one move at a time. Change only one move per week, so progress stays trackable and safe.
4 week progression table
| Week | Rounds | Reps or time per move | Rest between moves | Rest between rounds | Effort target |
| Week 1 | 2 | Squat 10, push up 6, bridge 10, lunge 6 per side, bird dog 6 per side, plank 15 seconds | 20 seconds | 60 to 90 seconds | Easy to moderate, 2 reps in reserve |
| Week 2 | 2 | Squat 12, push up 8, bridge 12, lunge 8 per side, bird dog 8 per side, plank 20 seconds | 20 seconds | 60 seconds | Moderate, 1 to 2 reps in reserve |
| Week 3 | 3 | Same as week 2 | 15 to 20 seconds | 45 to 60 seconds | Moderate, 1 rep in reserve |
| Week 4 | 3 | Same as week 3, plus one harder version | 15 seconds | 45 seconds | Moderate to hard, 1 rep in reserve, form clean |
Review after four weeks, checking sessions completed, rounds, reps, soreness, and any pain, before adding bands, dumbbells, or HIIT. A simple session log, with date, rounds, reps, effort, and notes, shows progress better than memory alone.
How Many Calories: Honest Range Only
Calorie burn varies by body weight, pace, effort, and move selection, so no single number fits every beginner. Competitor estimates below are labelled as competitor estimates only, and they must not be presented as guaranteed burns.
| Intensity, competitor framing | Competitor estimate, 20 minutes | Variables |
| Easy beginner cardio, Millionaire Hoy estimates | 91 to 169 calories | Body weight, pace, move selection |
| Gentle walking, video summary | Up to 200 calories | Pace, stride, arm movement, body weight |
| HIIT, Fitness Blender estimate | Up to 220 calories or more | Intensity, jumps, fitness level, not beginner day one |
| Tabata, SOLE brand page estimate | 200 to 300 calories | Intensity, treadmill use, brand page, not beginner day one |
Fat loss, where it occurs, comes from total energy balance, including diet, total activity, sleep, and consistency over weeks, not from one 20 minute session or one abdominal move. Core work builds core strength and stability, while spot reduction from crunches does not remove belly fat specifically.
Afterburn claims need caution, since excess post exercise oxygen consumption exists in physiology, but the size for a beginner 20 minute session is small and variable. Do not use afterburn percentages to sell a hard Tabata session to beginners, since the main benefit is consistency, not a large afterburn.
Common Mistakes and Fixes
- Speed over form, rushing reps to beat the clock, with knees caving, back arching, or hips sagging. Fix: slow each rep, use the easier version, and stop the set when form breaks.
- Too much too soon, starting with three rounds, full push ups, and jumps on day one. Fix: start with two rounds, easier versions, and add one progression per week.
- Skipping warm up, jumping straight into squats and planks cold. Fix: keep the full 4 minute warm up, even on busy days, with marching and gentle squats first.
- Skipping cool down, stopping suddenly after the last round. Fix: keep the full 3 minute cool down, with slow walking and breathing, before sitting down.
- No rest days, doing strength sessions daily for the same muscles. Fix: use non consecutive strength days, with walking or gentle movement on other days.
- Holding breath, especially during planks, bridges, and squats. Fix: breathe normally, exhale on effort, inhale on return, and shorten the hold if breathing stops.
- Ignoring sharp pain, pushing through knee, back, wrist, or shoulder pain. Fix: stop at once, note the move and pain location, and seek clinician or physical therapist advice before repeating it.
- Comparing to others, copying a creator’s pace, depth, or reps exactly. Fix: use your own easier versions, your own range, and your own progression table.
- No tracking, relying on memory for rounds, reps, and soreness. Fix: log date, rounds, reps, effort, and notes after each session, and review weekly.
- All or nothing thinking, skipping a week after one missed session. Fix: do a shorter session, one round only, or a walk, and return to the normal schedule next day.
Expert Tips
- Same time, same place, with a mat laid out the night before, turns a decision into a habit. Habit stacking, pairing the session with a morning coffee or lunch break, works better than willpower alone.
- Lay out clothes and water before the session, so the only step left is pressing start on the timer. Friction kills habits faster than difficulty, especially on busy mornings.
- Track sessions, not just results, with a simple log of date, rounds, reps, and effort. Sessions completed is the best early progress metric, since strength and stamina follow consistency.
- Use a talk test for intensity, aiming for breathing that feels noticeably harder, while still able to speak in short sentences. That level matches moderate intensity for most beginners, without a heart rate monitor.
- Film one set per week, with a phone on a chair, to check squat depth, push up line, and plank position. Video feedback shows form errors that mirrors miss, especially for hips and knees.
- Change one variable at a time, reps, rounds, rest, or version, never all four in the same week. Single variable changes make progress trackable and safe.
- Pair strength days with walking days, so weekly aerobic minutes rise without adding strength overload. Walking also aids recovery, mood, and sleep, in general association, not as a promise.
- Keep a backup session, one round only, or a 20 minute walk, for low energy days. A short session preserves the habit, while a skipped week breaks it.
- Review shoes and floor, with supportive shoes, a non slip surface, and a mat thick enough for knees. Worn out shoes and slippery floors cause avoidable slips and knee discomfort.
- Celebrate consistency milestones, such as 4 weeks completed, 12 sessions logged, or a first full push up progression. Milestones based on sessions, not weight or appearance, build a sustainable habit.
Equipment: Optional Only, Never Required
Mat is the most useful optional item, with a thick mat helping knees, elbows, and noise on hard floors. A folded towel works as a short term alternative, and no mat is needed for standing moves.
Supportive shoes help, with a stable, non slip sole, good heel support, and no worn out tread. Bare feet on a mat work for many readers, provided the surface is non slip and balance feels steady.
Resistance bands come later, with light bands adding gentle load to squats, bridges, and rows, only after bodyweight rounds feel easy. Bands are quiet, small space friendly, and cheap, but they are not needed for week one.
Dumbbells and kettlebells come later still, with goblet squats, rows, and carries as later progressions, only after form, balance, and recovery feel solid. Kettlebell swings and heavy dumbbell work are intermediate moves, not beginner day one moves, and they need coaching or careful form learning.
Equipment comparison
| Item | Required for core routine | Beginner use | Later use |
| Mat | No, optional | Knee and elbow comfort, noise reduction | Same, plus floor core work |
| Chair, sturdy | No, but useful | Chair squat, balance support, seated dip | Step up, supported split squat |
| Wall | No, but useful | Wall push up, wall plank, balance support | Incline push up progression |
| Resistance band, light | No | Later, after bodyweight rounds feel easy | Squat, bridge, row, lateral walk |
| Dumbbell, light | No | Later, after bodyweight form is solid | Goblet squat, row, carry, press |
| Kettlebell | No | Later, with coaching or careful learning | Deadlift, goblet squat, carry, halo |
FAQs
Is a 20 minute workout enough for beginners?
Yes, for starting, since a 20 minute session, 3 days a week, gives 60 minutes of activity, which is a strong habit base. CDC recommendations call for 150 minutes of moderate aerobic activity per week, plus muscle strengthening on at least 2 days, so add walking days to reach the full weekly target.
How often should beginners do a 20 minute workout at home?
Two to three non consecutive days per week suit strength circuits, with at least one rest day between sessions for the same muscle groups. Add walking or gentle movement on other days, and increase days or rounds only when form stays clean and soreness recovers.
Can beginners do a 20 minute workout every day?
Daily gentle movement is fine, such as walking, stretching, or a short mobility session, but daily strength circuits for the same muscles are not ideal for beginners. Muscles recover and adapt during rest, so alternate strength days with walking or rest days.
What exercises should beginners do in a 20 minute home workout?
Six basic moves cover full body balance: squat, push, glute bridge, reverse lunge, bird dog or dead bug, and knee plank, plus gentle marching for cardio. Each move has an easier version, such as chair squat, wall push up, half bridge, step back, and wall plank.
Do I need equipment for a 20 minute beginner workout at home?
No equipment is needed for the core routine, with a mat, chair, and wall as optional helpers. Bands, dumbbells, and kettlebells are later progressions, only after bodyweight rounds feel easy with clean form.
What is a good warm up for a 20 minute beginner workout?
Four minutes of dynamic movement works well: marching in place, arm circles, gentle squats, side steps, and torso twists, 30 seconds each, twice through. Warm up raises heart rate, breathing, and joint mobility gradually, without static stretching before the session.
How many calories does a 20 minute beginner workout burn?
Competitor estimates range from 91 to 300 calories, depending on body weight, pace, effort, and move selection, with easy cardio at the low end and Tabata at the high end. Use the range as a rough guide only, with no guaranteed burn, and focus on consistency, not calorie counting per session.
How do I modify push ups as a beginner?
Start with wall push ups, hands at shoulder height, feet back, body straight, with a steeper wall angle for less load. Progress to knee push ups on a mat, then to incline push ups on a counter, then to full push ups, one step at a time, with elbows at about 45 degrees.
How do I modify squats as a beginner?
Start with chair squats, sitting back until hips touch a sturdy chair, then standing tall through the heels. Keep chest tall, heels down, and knees tracking over toes, with a shallow range that stays pain free, adding depth only as strength improves.
How long should a beginner plank be?
Fifteen to thirty seconds suits most beginners, with form stopping the set, not the clock, whenever hips sag or pike. Short, clean planks build core stability better than long, sagging planks, and time can increase by five seconds per week when form stays clean.
Are squats safe for beginners with knee pain?
Shallow chair squats and glute bridges are often safer starting points, with no deep squats, no jumps, and no forward lunges with a long stride. Stop if knee pain is sharp, swelling, locking, or getting worse, and seek physical therapist advice before repeating the move.
How do I do a 20 minute workout at home with no jumping?
Use step instead of jump for every move, with step touch replacing jumping jacks, marching replacing high knees, and step back replacing burpees. Keep one foot on the floor at all times, land softly, and use a mat for noise and comfort.
How do I do a 20 minute workout at home in a small apartment?
Use a space about two metres by two metres, with all moves in place, no travel across the room, no jumps, and no dropped weights. Reverse lunges in place, side steps in place, and marching in place give full body work without travel or noise.
Should beginners do cardio or strength first in a 20 minute workout?
Strength first suits most beginners in a short session, since fresh muscles learn form better, with gentle cardio woven in as marching between moves. Walking days can focus on cardio separately, so weekly balance comes from the full week, not from one session.
Should beginners do HIIT workouts?
True HIIT, with jumps, burpees, and Tabata intervals, is not ideal for day one beginners, since it raises injury risk and soreness that kills adherence. Start with controlled strength circuits and walking, then add short, low impact intervals later, only when form, balance, and recovery feel solid.
When should I make a beginner workout harder?
Make it harder only when the last reps feel easy with perfect form, adding reps first, then rounds, then a harder version, one change per week. If form breaks, breathing stops, or soreness lasts more than three days, stay at the current level for another week.
How sore should I be after a beginner workout?
Mild muscle soreness for one to two days is normal, especially in week one, with stiffness that eases with gentle movement. Sharp pain, joint swelling, or soreness that worsens after three days needs review, with rest and clinician advice before the next hard session.
Is walking enough exercise for beginners?
Walking covers aerobic minutes well, with about 2,000 to 2,500 steps in 20 minutes in video summaries, but it does not cover muscle strengthening. Pair walking days with strength circuits, so weekly activity meets both CDC targets: aerobic minutes plus muscle strengthening days.
Does a 20 minute workout meet CDC recommendations?
Three sessions of 20 minutes equal 60 minutes, which is less than the 150 minute aerobic target, but two of those sessions count toward the muscle strengthening target. Add walking days, for example 30 minutes on three other days, to reach 150 minutes total, with strength days included.
How do I start working out at home as a complete beginner?
Start with the timed routine above, two rounds, easier versions, and a session log, on three non consecutive days. Lay out a mat, chair, and water the night before, set a timer, and focus on form and consistency, not speed or depth.
What should I do if I feel dizzy during a workout?
Stop at once, sit or lie down, drink water, and breathe slowly, with a chair or wall for support. Seek care promptly if dizziness repeats, comes with chest pain, shortness of breath, or fainting, and check with a clinician before the next session.
Will a 20 minute workout help me lose weight?
A 20 minute workout helps total activity, which supports weight management over time, but weight change depends mainly on total energy balance, diet, sleep, and consistency across weeks. No single session, move, or workout promises weight loss, and spot reduction from abdominal moves does not work.
How do I track progress in a beginner workout?
Log date, rounds, reps, effort, and notes after each session, with a weekly review of sessions completed, form quality, and soreness. Progress shows as more reps with clean form, longer planks, easier rounds, and faster recovery, not just as weight or appearance changes.
Conclusion
20 minute workout at home for beginners succeeds when it stays simple, timed, and repeatable, with a warm up, six basic moves, easier versions, and a cool down. Two rounds in week one, three rounds by week three, and one harder version in week four give a clear path, without jumps, without equipment, and without guesswork.
For most readers, the practical next step is clear: set a timer for twenty minutes, start with the routine above, use the easier versions freely, and log the session. Add walking days to reach CDC weekly targets, keep rest days between strength sessions, and seek clinician advice for pain, dizziness, or any condition that affects safe exercise.